

Old Fashioned Pumpkin Pie Recipe
Jump to Recipe
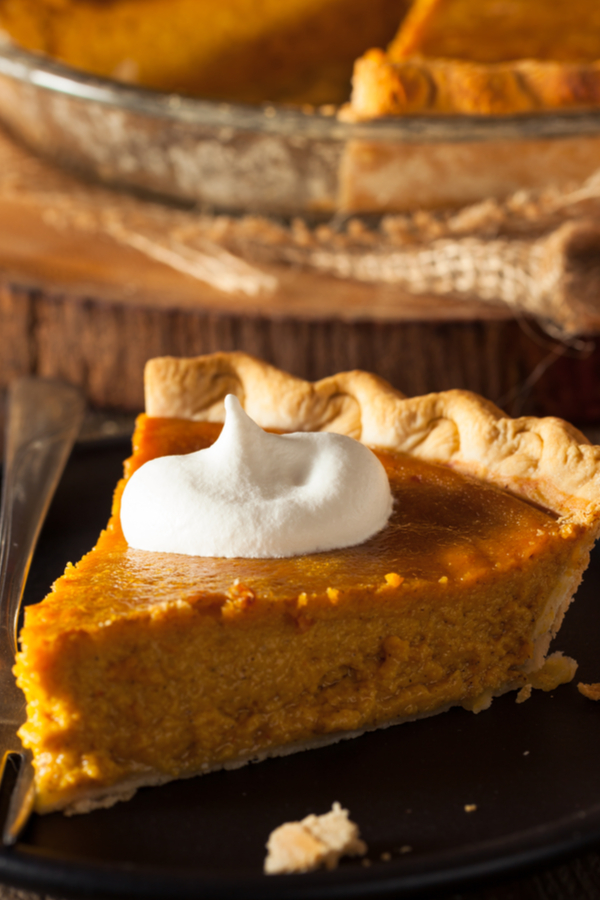
One of the most popular desserts that is served around the holidays is pumpkin pie. And although you could order one from your favorite bakery, it is super easy to make your own.
Nothing fancy, no crazy ingredients, just a simple, but delicious pie that is cooked in a light and flaky, golden crust.
And beyond popular belief, you don't have to make a homemade crust to make the perfect pie. Refrigerated pie crusts have come a long way and are not only delicious, but are a huge time saver as well.
So this year, when you are planning to make dessert for Thanksgiving, Christmas or your next family or friends gathering, be sure to save this easy recipe that everyone is sure to love!
CLASSIC PUMPKIN PIE RECIPE
INGREDIENTS
Canned or Fresh Pumpkin Puree, not pumpkin pie filling
Sweetened Condensed Milk
Eggs
Pure Vanilla Extract
Pumpkin Pie Spice
Light Brown Sugar
INSTRUCTIONS
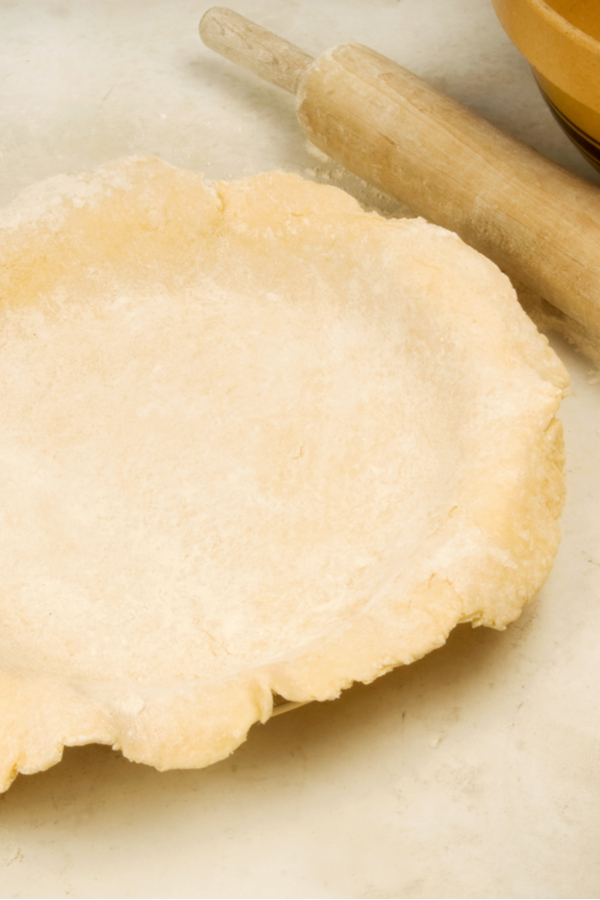
The first step in making a classic pumpkin pie is to preheat the oven and prepare the pie plate. Roll out pie crust and place in a pie pan.
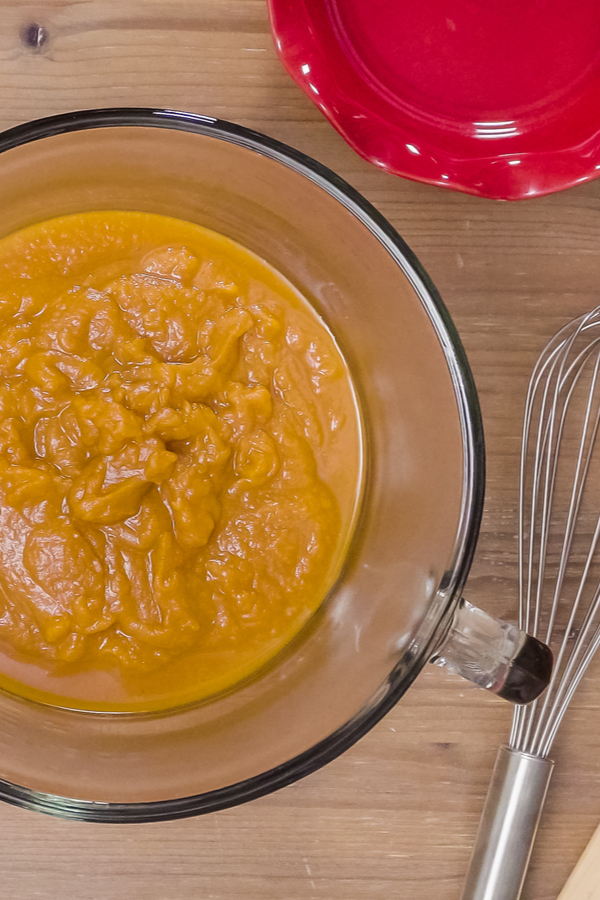
Poke the bottom with a fork several times and scallop the edges or crimp with your fingers. In a large bowl add the pumpkin puree and sweetened condensed milk and mix until combined.
Add the remaining ingredients and whisk until smooth. Pour the filling into the prepared pie crust.
Bake for 15 minutes, then reduce the oven temperature to 350°F and bake for an additional 40 minutes
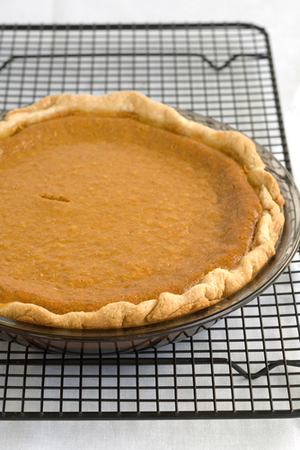
Cover the pie crust edges with foil if it browns too quickly. Remove the pie from the oven when it is no longer jiggles in the center.
Mom's homemade pumpkin pie
As a child, I remember my Mom baking a pumpkin pie the night before Thanksgiving. She would roll out the crust on her Baker's mat with her wooden rolling pin .
The mat served a dual purpose. First of all it was considered a non-stick mat. This helped decrease the need for excessive flour to be placed on the rolling surface.
But the best part about the mat was that it had various circles and measurements printed on the surface. This guide helped you know exactly how far you had to roll out your dough for the perfect 9 inch pie crust.
Once the dough was rolled out to the perfect measurement, my mom would then roll the dough onto the rolling pin. Then carefully place it in our glass pie plate .
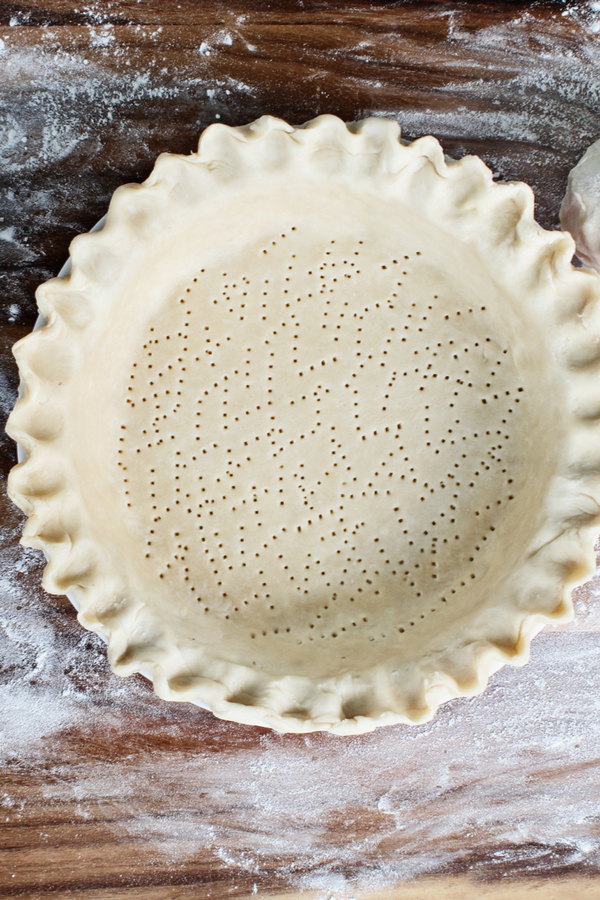
She would scallop the edges around an old wooden spoon handle. This same spoon was one used on occasion to shoo us out of the kitchen when we got too rowdy.
A few pricks in the bottom of the crust with a fork and it was ready for the pumpkin pie filling.
After about an hour in the oven, the pie was perfectly baked. The crust was golden brown and the filling had a tiny bit of jiggle in the very center of the pie.
Once it cooled, it firmed up perfectly and into the refrigerator it went! Right before we sat down to enjoy your Thanksgiving feast we would pull it out of the fridge and set it on the buffet table in the dining room.
Patiently waiting for the pumpkin pie…
My assigned seat looked directly at the buffet table filled with not only the pumpkin pie, but all the desserts that were brought or made.
I could hardly contain myself during dinner in anticipation of dessert.
I patiently waited through what seemed like the longest meal ever. And I would always drop hints to my parents as they talked with my older relatives to remind them that everyone had finished their meals.
Enjoy! Mary
To receive our 3 RecipeArticles in your inbox each week, sign up for our free email list located on the side and bottom of each recipe. You can also follow us onFacebook and Pinterest. This article may contain affiliate links where a small commission is paid if you purchase a product at no additional cost to you.
Ingredients
- 15oz. can pumpkin puree or fresh pumpkin puree, not pumpkin pie filling
- 14 oz can Sweetened Condensed Milk
- 2 large eggs
- 1 teaspoon pure vanilla extract
- 1 1/2 teaspoon pumpkin pie spice
- 1/4 teaspoon salt
Instructions
- Preheat the oven to 425°F.
- Roll out pie crust and place in a pie pan. Poke the bottom with a fork several times and scallop the edges or crimp with your fingers.
- In a large bowl add the pumpkin puree and sweetened condensed milk and mix until combined.
- Add the remaining ingredients and whisk until smooth.
- Pour the filling into the prepared pie crust.
- Bake for 15 minutes, then reduce the oven temperature to 350°F and bake for an additional 40 minutes Cover the pie crust edges with foil if it browns too quickly.
- Remove the pie from the oven when it is no longer jiggles in the center.
Notes
Let cool completely. Recipe provided by Make Your Meals
Nutrition Information:
Serving Size:
1 grams
Amount Per Serving: Unsaturated Fat: 0g
Old Fashioned Pumpkin Pie Recipe
Source: https://makeyourmeals.com/old-fashioned-classic-pumpkin-pie-recipe/
Posted by: gardnersuchibiant.blogspot.com
0 Response to "Old Fashioned Pumpkin Pie Recipe"
Post a Comment